| |
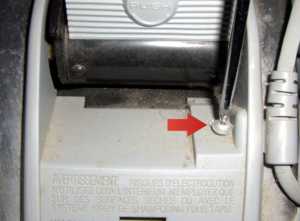 |
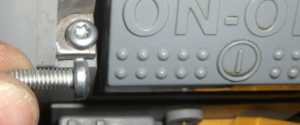
1.
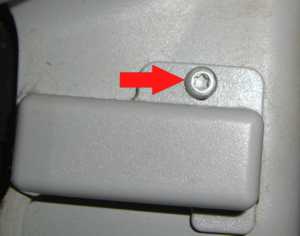
Remove scuff plate screw (Kirby parts number 233506S) holding the cord clip (T15 torx screwdriver or Phillips screwdriver on older models) |
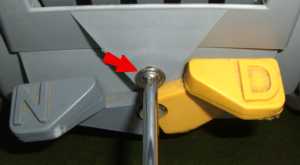 |
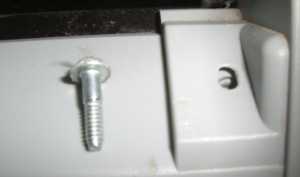
2.
Remove scuff plate bottom screw (Kirby parts # 233405S) (T20 torx screwdriver or Phillips screwdriver on older models) |
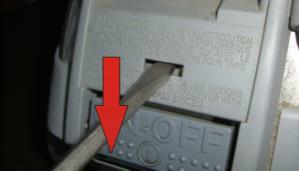 |
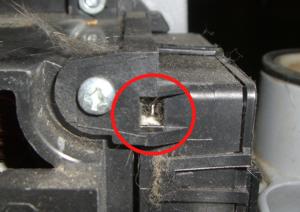
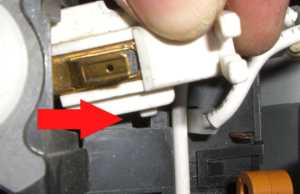
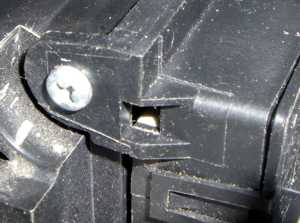
3.
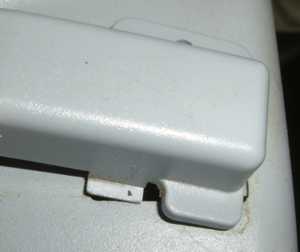
Put the flat screwdriver through the opening and push it down thus releasing a latch inside so you can take the scuff plate off. |
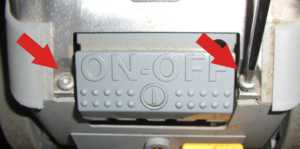 |
4.
Remove 2 rear cover shell screws (Kirby part # 232495S ) (T20 torx screwdriver or Phillips screwdriver on older models) |
 |
5.
Remove 2 front cover shell screws (Kirby part # 232395S ) (T20 torx screwdriver or Phillips screwdriver on older models) |
 |
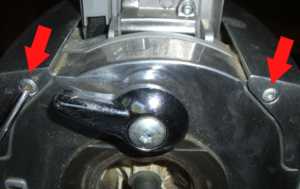
6.
Remove 2 screws in front of the unit that you will find under the shell. They hold the headlight cap and slide bracket assembly. |
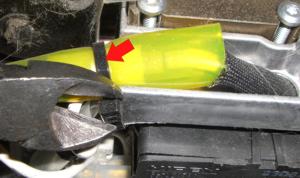 |
7.
Cut the cable tie that holds vinyl tubing protecting wires to headlight. |
 |
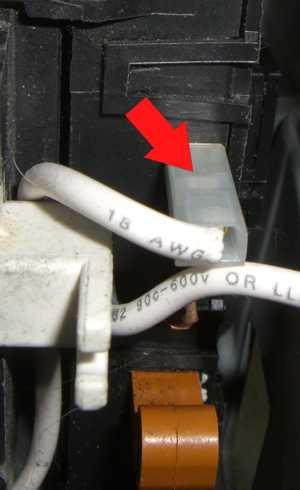
8.
Disconnect headlight wire that was protected with the tubing. |
 |
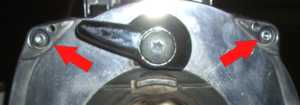
9.
Remove 2 rear slide bracket screws (Kirby part # 232495S) (T20 torx screwdriver or Phillips screwdriver on older models) |
 |
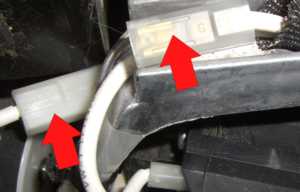
10.
NOTE !!!
When removing slide bracket with the headlight you will have to disconnect second headlight wire. make note where it is so you can find it when assembling it back. It is very easy not to notice this "well hidden" connector. |
 |
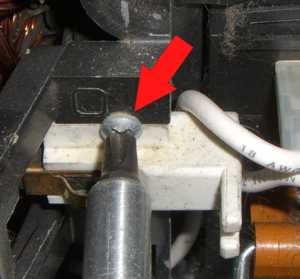
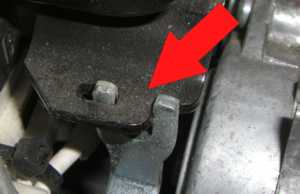
11.
Remove Kirby power switch screw holding switch to the motor |
 |
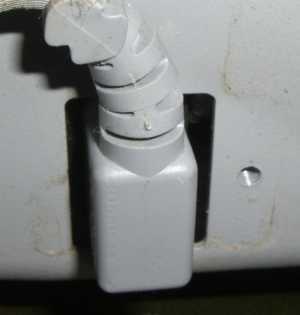
12.
Pull the plastic ON/OFF pedal of the transmission. It comes off VERY EASY |
 |
13.
Disconnect pedal from actuator rod . |
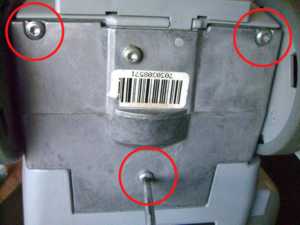 |
14.
Remove 3 screws on the bottom of the kirby holding the tech drive onto the unit (Kirby parts number 230693A)
(T20 torx screwdriver or Phillips screwdriver on older models) |
 |
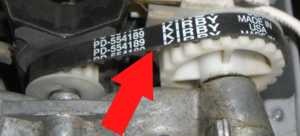
15.
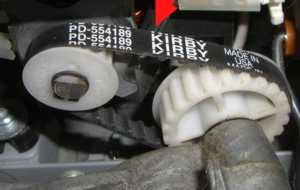
As transmission gets a bit loose you can get gears closer to each other so now you will be able to remove the primary drive belt (You can buy it here) and that will release transmission completely. |
 |
16.
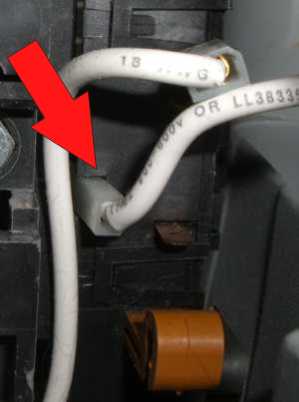
Disconnect the wire connecting motor brush terminal to the Kirby switch
Wire (Kirby parts catalog # 602889A)
Kirby motor brush (carbon) (Kirby parts catalog #107189A)
Kirby power switch (Kirby parts catalog #110590) |
|
|
17.
Remove carbon motor brush screw (Phillips screwdriver) and then the brush/housing assembly. |
 |
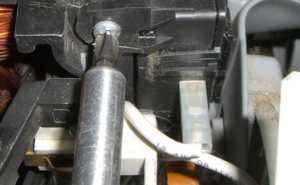
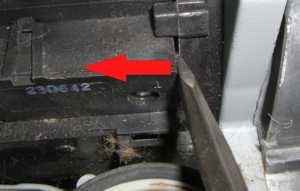
18.
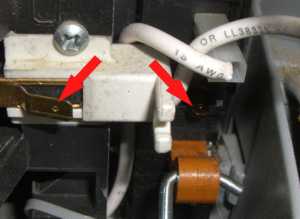
Disconnect the long wire that goes down, under the motor and into motor brush on another side of the Kirby motor (red arrow) and the second headlight light wire (blue arrow). |
 |
19.
Remove cord set cover screw (Kirby parts #232495S) (T20 torx screwdriver or Phillips screwdriver on older models) |
 |
20.
Remove cord set cover by twisting it a little bit clockwise and taking out the plastic lip on the side of the cover from inside of the housing first . |
 |
21.
Remove the power cord. |
 |
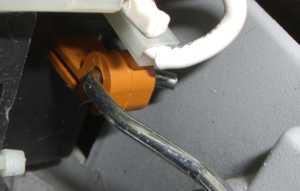
22.
Use a flat screwdriver. Push it between the switch and the front motor housing and gently push the Kirby power switch (Kirby parts catalog #110590) off the motor. |
 |
23.
Install new power switch. Be gentle - do not bent and/or break terminals. |
 |
24.
Plug in the wire that you have disconnected from the headlight |
 |
25.
Install motor brush by first inserting a plastic protrusion into the motor housing |
 |
26.
And then attaching it with the screw (Kirby part number 107989A) and then the brush/housing assembly. |
 |
27.
Connect left motor brush - the long wire that goes down, under the motor and into motor brush on another side (Kirby part number 602989A) |
 |
28.
Connect right motor brush
Wire (Kirby parts catalog # 602889A) |
 |
29.
Connect actuator rod to the new Kirby power switch. |
 |
30.
Put back the switch screw |
 |
31.
Insert the transmission back into Kirby, install the belt on the plastic gears before you attach the transmission to the Kirby main body with screws. |
 |
32.
Make sure that switch actuating rod is not caught in between transmission and the housing. |
|
33.
Tighten all 3 screws on the bottom of the kirby holding the tech drive onto the unit (Kirby parts number 230693A)
(T20 torx screwdriver or Phillips screwdriver on older models) |
|
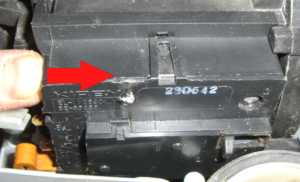
34.
Just like you removed the pedal - slide it back onto the rod (JUST OPPOSITE TO THE AROW) |
|
35.
And attach the ON/FF pedal to the transmission (JUST OPPOSITE TO THE AROWS) |
 |
36.
Install the Kirby slide bracket with headlight by plugging the long headlight wire back. If you can not find where to plug in - see step #10 |
|
37.
Install the headlight cap and slide bracket assembly
Put the rear screws in first but do not tighten them yet |
 |
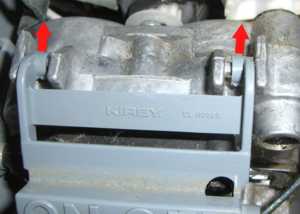
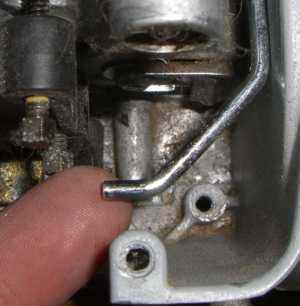
38.
Make sure this is how handle pivot spring assembly is connected to the Kirby transmission. |
|
39.
Install 2 screws in front of the unit that hold the headlight cap and slide bracket assembly. |
|
40.
Now tighten rear screws holding the slide bracket. |
|
41.
Put in back 2 front cover shell screws (Kirby part # 232395S ) (they have pointy end and are cone shaped at the bottom)
(T20 torx screwdriver or Phillips screwdriver on older models) |
 |
42.
Install 2 rear cover shell screws (Kirby part # 232495S ) (T20 torx screwdriver or Phillips screwdriver on older models)
|
 |
43.
Scuff plate / Cord clip screw (Kirby parts number 233506S) holding the cord clip (T15 torx screwdriver or Phillips screwdriver on older models)
(do not forget to put cord clip under the scuff plate) |
|
44.
Scuff plate bottom screw (Kirby parts # 233405S) (T20 torx screwdriver or Phillips screwdriver on older models) |
|
45.
Plug in the the power cord into the newly installed switch. |
|
46.
Install and attach cord set cover with screw (Kirby parts #232495S)
(T20 torx screwdriver or Phillips screwdriver on older models) |
| |
DONE |